Today I have finally completed the image denoising plug-in which I started writing last week. Previously the code could only handle grayscale images and that too of specific resolution (power of 2). Now the implementation is generalized and gave pretty good results on testing under various levels of noise. The main problem I faced during this time was in understanding how the gimp processed colored images using a single array. I had the concept right, but was reading images by the Matlab format which reverses the x and y coordinates. I didn’t realize what I was doing wrong until I asked Simon (my mentor) about it.
Once I fixed that, I was getting results but they did not seem satisfactory for images of dimension say 240×260. I stored this image in a 512×512 array and set the necessary values to the image pixels and set the rest of the values to 0. As you can see, a large part of the image will be 0 and thus the overal image noise becomes small. For this reason it was not denoising the image properly. The solution was to extend the image in each direction to create 2*(240*260) image and read the values of 512×512 array accordingly. This way the noise level remains the same and the denoising is done successfully. Some examples of how the denoising is performing are shown here.
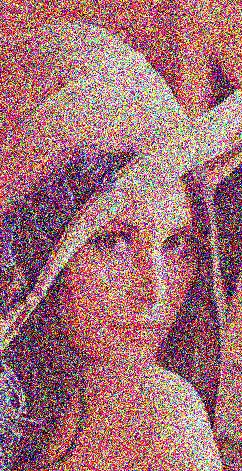 noisy image
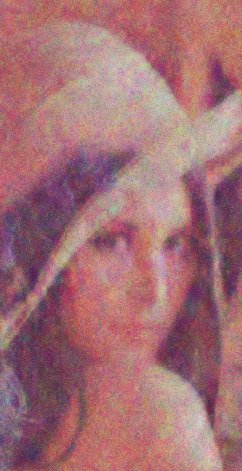 denoised image
 blurred image
 noisy image 2
 denoised image 2
There is a lot of noise in the first image and the corresponding denoised is not that good but this is understandable considering the amount of information lost due to noise. Notice what happens the the first noisy image is blurred. The noise is gone but the image is severally blurred which is not good. Clearly this denoising method is superior and restores the basic image even if the noise is a lot. The noise in the second image is not that much and hence the denoised image looks much better.

Leave a comment